well i had to stop for a while to build the work benches, but because of them my speed has increased incredible, its so easy to get your cuts correct. as well as opened me up to heaps more things i can do eg: the other day i didn’t have the correct width wood i wanted 15mm and i had heaps of 75mm so with the bench saw i set up a “fence” to keep it straight and got 60 done VERY quickly and all the same size. https://www.youtube.com/watch?v=rVmezDGlqsQ
 the roof is 2 main lenghts in the middle front to back with 3 cross beams, i did this first and lifted it into positionthe lenght is the same as the walls so i secured it by placing the front up on the front beam and the back level with the top of the back cross beam, this gives me a slight slope and there will be a gutter and a downpipe there.
it may look skewy but its not, its camera angle
once secured i added in the outside cross bean ensuring the slope continued.
basically once again its a wall frame struture/design but as a flat roof.
 these are close ups of the back showing it level with the current top of the back wall, i used an “L” piece of metal, first screwing it to the beam then using small nails to the back wall.
there really isn’t any weight in the roof so you don’t need over-kill
here you see the front an how the beams sit on top, with the spacer beams, its own weight holds it down, i’ll come back later and put more support in case of a storm.
th en i added and overlapped the back wall with plastic sheets, not sure where i got them from but they are 2.4m x 1.2m so they were perfect, i think they were used for some kind of packaging, i’ve seen this type of thing BETWEEN pallets of stock on trucks/containers so maybe thats where from?
“de-stuffing” containers is a great place to find wood and packaging etc that they just throw out, there is always a transport company that does it, what happens is the stack a container overseas and fill EVERY space, it then has to be palletised for distribution.
view from outside the frame of the backwall, it gets NO sun EVER as its almost due south so the white will reflect some light back and make a good vermin barrier.

this is a closeup of the plastic
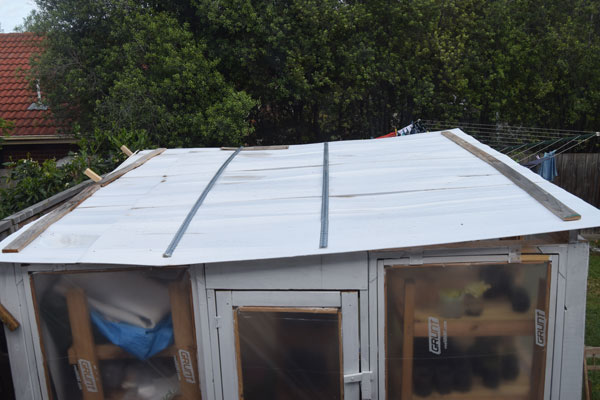
then i put the roof on, the rain always comes from the west ( right) so i overlapped the sheets so the right side is on top and then middle then left so the water won’t get pushed inside……… not that it would matter !
closeup of the roof and back wall from the inside.
once up test it extensively with your hose, spray it like “hard” rain across the surface and wtch for ” pop-holes” these are low patches that seem meaningless but once water gets in them the bend and then gather more and more water until the roof buldges and splits.
this will of course depend on your roof material, mine has proven to thin to have the strenght to cross 900mm so i’ve had to put in extra small beams, just 10mm sq was enough.
next step putting the windows together, they are frames made for 25mm x 25mm wood screwed in the corners, they will have clear-ish plastic in the inside held to the frame by 10mm wood nailed to the frame.
then 2 top hinges made from plastic milk carton ! and a handle for made from plastic packaging strapping tape for cartons !!!
so, that tough packaging strapping tape thats heat sealed cut into strips, bent, and nailed, now to see how it handles a lot of sunshine over summer?
of course you’d get a fair few out of 1 bottle but i just did this to show you, then just nail it.
the frames i built are detailed above, i then cut 1m sq sheets of plastic from a builders roll i got from bunnings, 2m x 20m (100ua) [ $70 ]
i then lay it over the frame and insert the inner framing wood, trying to streach it , i did top and bottom then sides, i also put the small nails into the wood first , this helped tightening the plastic because i didn’t have to hold the nail.
then put the handle and hinges on, which will just leave you a few nails to hang your window, i put the windows so the plastic is sheer to the outside, i’ll put a latch on the inside to prevent windblowing them open.
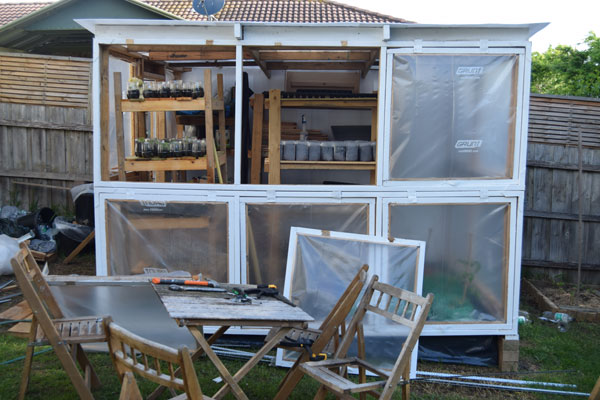
2 windows up, as you can see diffused plastic which i think will let enough light in, the windows easily open to control the internal temperature, i haven’t decided on how to open the windows and making it variable remebering there will be plants against the windows.
now we painted it, as its all untreated pine.
So we had a huge storm here over the weekend with wind gusts of @ 60klm in our area, melbourne had up to 100klm.
the green house took some damage, i opened a few windows and the door to let wind through but it didn’t help totally, the wind blew out part of the back wall, lifted part of the roof, smashed the 2 side windows i had opened, it smashed them by open/close/open slammmmm close ! and totally blew out 2 front windows, once that was all done i just left it and there was enough wind getting through to cause no damage.
none of this would have happened if i had glass windows with latches but the plastic forms a sail and that is the problem, also my hinges are just plastic milk bottles so not much strength compare to metal.
i repaired the roof straight away with 2 strips of metal, the long stuff with holes every cm they use to cross support house frames, there is ALWAYS heaps thrown away, once the wind died off i repaired the rest which took me all of @ 20 minutes, a few new nails and it was all done.


