I’m building 2 benches, both bases are the same design, the first is going to be a table saw made from a circlular saw upsidedown, a router upsidedown and a jig saw…. you guessed it, upsidedown.
 all 3 of these tools have distinct advantages when put into a table, each is removeable for normal use.
the 2nd bench is a larger flat bench and it will have a “leg vice” https://www.youtube.com/watch?v=B0rzjblBXIY
dimensions don’t matter here, just pick what suits you and your space.
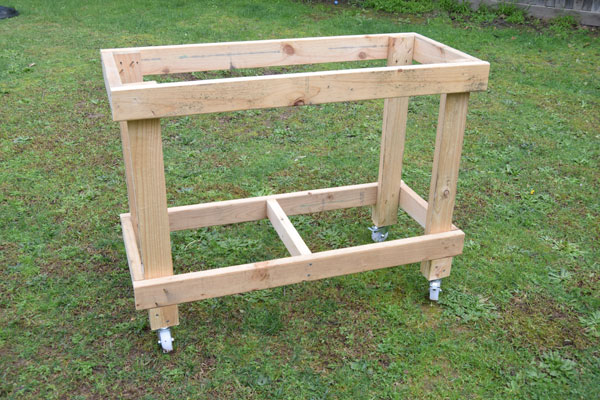
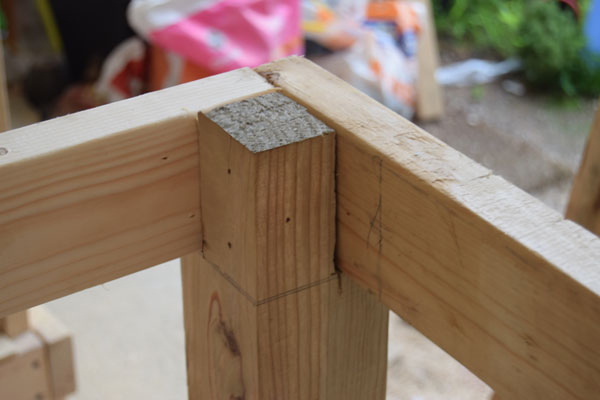
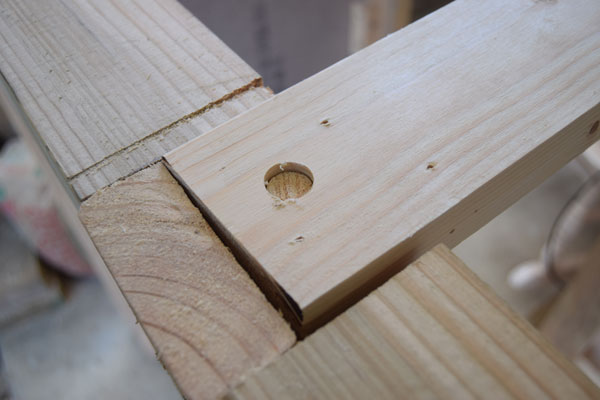
using this method, ( 4 legs, top beams, bottom beams ) , you can build anything large or small, a thin tall side table, a coffee table, a school desk etccccccc.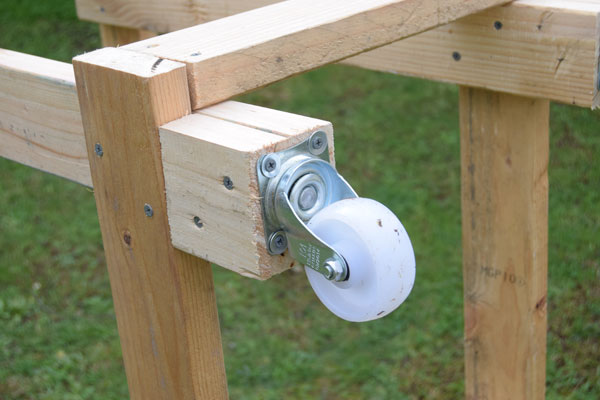
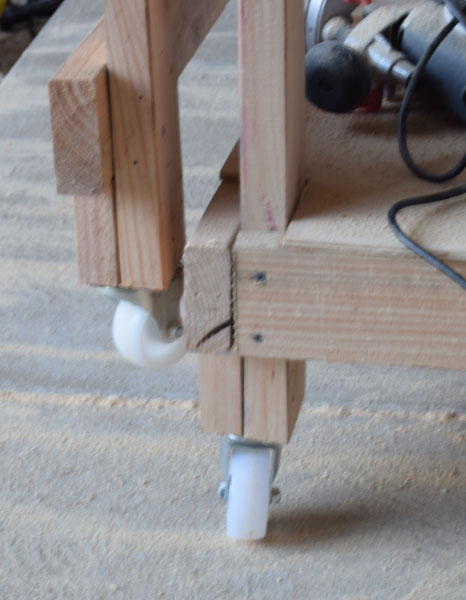
the castors i’m using are 70mm sq bracket so added a small offcut to the bottom of each leg to give it support, i have seen others screw just 2 holes on a diagonal which seems to work for non heavy usage.

 at the base i cut 2 thin sheets of ply around the legs, they can easily slip in and out but i did it this way because i had a ling thin lenght as an off-cut, its only 3 ply so the centre bottom cross over beam is needed.
 the table-top is mad up of 20mm chipboard with 9 ply glued on top to make a smooth top, the 20mm chipboard is HEAVY and solid so no cross beam is need but that takes 29mm away from the blades so i cut a hole in the chip/b and screw to the ply so now i just loose 9mm.
i’ll need 9mm as i will be putting in tracks to run my sled across the table saw. this is a good example https://www.youtube.com/watch?v=FPYkImHs9mM, NOTE how he has made it so your thumbs can’t slide into the saw blade path,
the first bench top has an over lap as i will be putting a saw-fence for the table saw. https://www.youtube.com/watch?v=rVmezDGlqsQ , i’ll be going all the way across eidth and having it align on the other side as well, https://www.youtube.com/watch?v=R6_O9AeQQHc
then we have the larger bench, this table-top has no over hang, to attach it to the base and add another level of solid, plus square, i’ve just got some off cuts of sq wood, 2 screws into the side, 2 screws into the bottom of the base
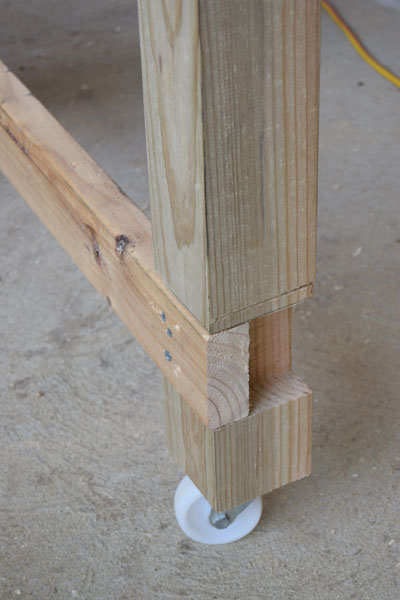
on this table i have put in a thicker leg, i had to cut it so i didn’t change the width + keep the underside thin as the large table is designed to slide up and over the smaller work bench, the tools will retract down under the bench.
both tables are made together so that they are the same height, so i can bunt the large table anywhere to the tool table to add space eg: cutting sheets of ply etc.
here you can also see the bottom thick leg indent cut. this thick leg is where the vice is going.
the table top is the same as the work bench, 20 mm chip/b and 9mm ply.
the large one will also have bench-dogs running off the vice once built. https://www.youtube.com/watch?v=f92KytGw6mU
you will see a mountain of video showing you how to make dogs, my suggestion watch a couple then watch this one, i know which you will choose, https://www.youtube.com/watch?v=ggu-mD1Og-k , then do the “pretty” ones down the track.
for me i am using 22m holes as i have a 22mm drill bit and 22mm dowel from bunnings so a damn easy quick dog !
also if you think about the design its designed for planning wood, but if you make it a block at the top with your vice you could get some nice glue clapping done.
after that i am going to do 4 rows of dog-holes each 150mm apart as i want to do something like this:
i haven’t worked out clapping as this one has no table top but i will have, i’ll figure it out.
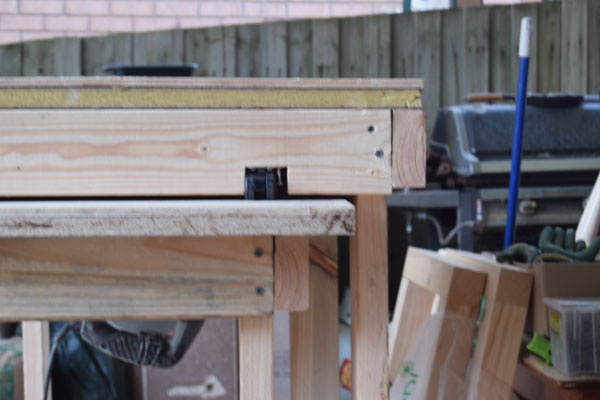
update: further to what i said before, here is 1 table on top of the other, excuse the mess, i did a mountain of cutting today.
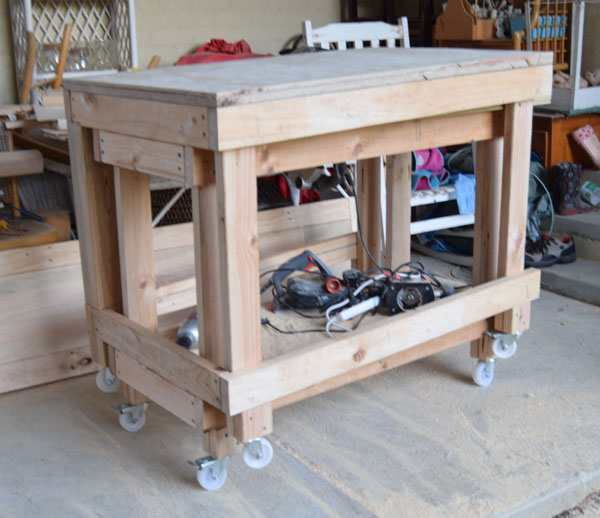 you can see the small wheels for rolling the other
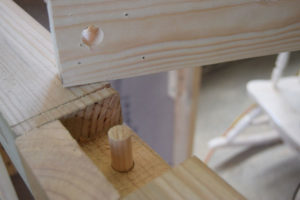 the cross beam under the rollers is removable to allow the benchs to slide, as you can see i have a piece of dowelin the legwhere i just tap the cross beam back on when i want to work. NOTE: i stuffed up here and put the removal cross beam at the wrong end, so i fixed that but these images show before i realised !
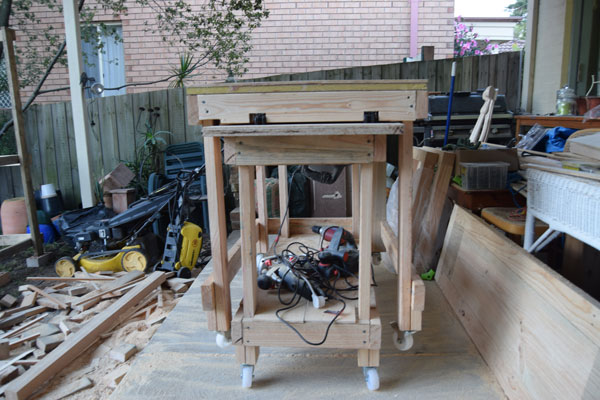
 you can just see the saw handle hanging under the table.
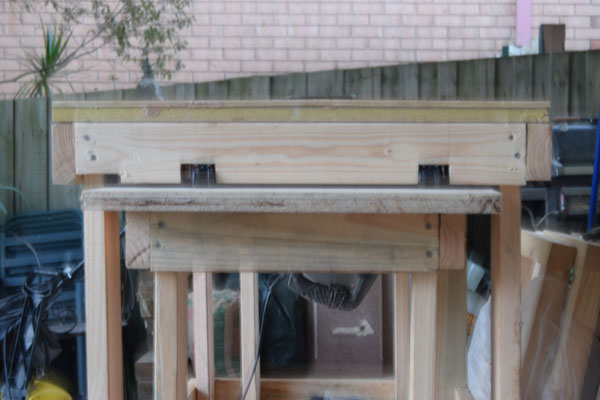
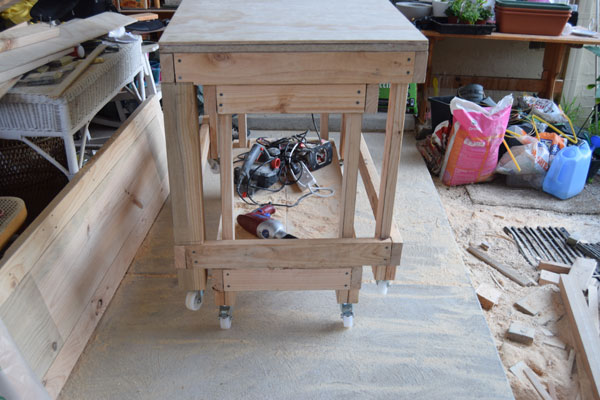
the rollers presently stop on the table top, i planned for it to go all the way and drop down leaving it flat so i could work without separating them.
- the weight of the top table has started to make track makes in the 9 ply, i i used hardwood it would be ok so i’have to work out a solution.
- the bottom table top is 20mm to long, i could just cut it but then i have other problems, so i’ll get back to you on my solution.